
This is my second blog dedicated to bird photography. As I did in the first, I’ll include a sprinkling of people and “other wildlife” photos to help drive points home about how I take pictures of birds. People and some other animals are more accessible than birds and more accommodating, too. Please refer to my first bird photography blog, “Bird Photos and Photo Tips at Midyear,” if some of what I write here doesn’t make sense. But hopefully, it all will!
A Look Back
Before we get started, here’s what I touched on in that first blog:
- Camera drive modes: single shot and burst mode (continuous shooting mode)
- Camera autofocus modes: One-Shot (Autofocus-Single or AF-S) and AI Servo (Autofocus-Continuous or AF-C)
- Back button focus
- Shooting at eye level and also trying to capture your subject’s eye
- Shooting to tell a story
I also need to correct something I wrote there about how I photographed Benjamin and his drum set. I tend to be a stickler for clarity and accuracy.

I wrote: “As Ben wasn’t moving, and the focal distance wasn’t changing, I was able to capture him using single shot mode.” First, “focal distance” is much better known as focus or focusing distance or the distance between the camera’s focal plane and the subject. Second, I meant to write that because the focusing distance wasn’t changing, I captured Ben using One-Shot autofocus mode. One-Shot mode is the mode of choice in situations like that. Third, I didn’t use single shot mode to take his pictures, I used burst mode. I needed to capture his hand just as it reached the top of the drum stroke.
Single Shot Mode
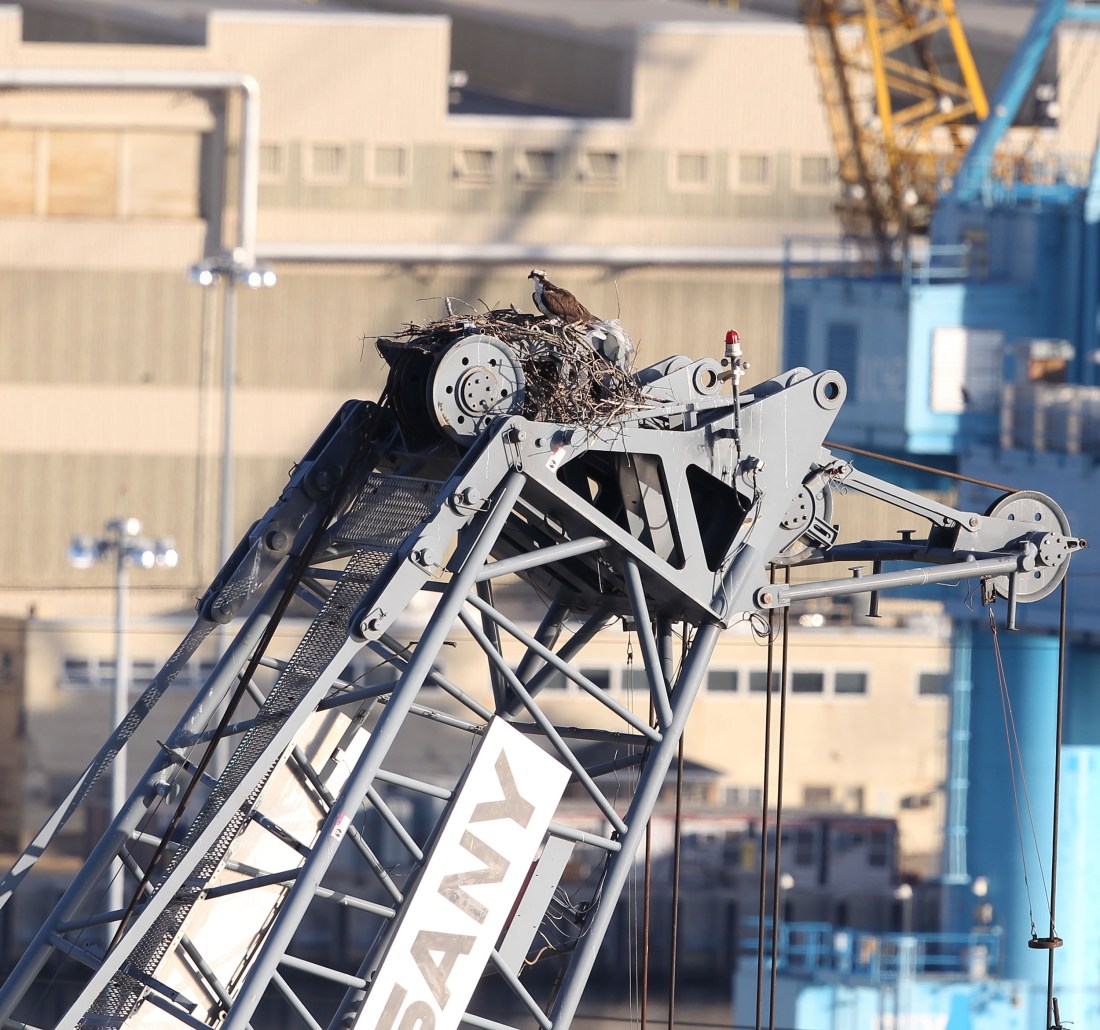
Now, in this photo of an Osprey nest on top of a construction crane in the Norfolk Naval Shipyard in Portsmouth, VA, I did use single shot mode. Like I said in the first blog, I’m using single shot more often. There were just no reasons, as in when I took Ben’s photos, to use burst mode. Why shoot multiple frames if each one would be the same, and why increase the shutter count that way? And I used One-Shot autofocus mode, as well. The Osprey wasn’t going anywhere. It appeared to be frozen to the nest rim (or better yet, “rooted” to the nest rim, as it’s summer). Incidentally, the nestlings weren’t visible here. Osprey nestlings usually aren’t visible for several weeks post-hatch.
AI Servo Mode
The 2 photo subjects above were stationary, more or less. At the very least, the focusing distance was constant. But what do you do if the focusing distance changes, as it did when I took this Osprey flight shot from atop the Veterans Memorial Bridge in Chesapeake, VA? This male was delivering nesting material to another Elizabeth River watershed construction crane nest and was flying right toward me. (You can read the story about that nest and what eventually happened to it in my blog, “Osprey Country.”)
You switch from One-Shot to AI Servo autofocus mode. As I wrote in my last blog, this is done easily by using the AF-ON button on the back of your camera. Back button focus to the rescue.

And you use burst mode, as well, to capture that special flight position/wing position, much like I used burst mode to capture Ben’s hand position.
Capturing Gesture
While we’re on the subject of using burst mode and capturing a special pose or gesture, here are some interesting words I came across recently: “I believe there are two things that will always improve a candid photograph, and that is a gesture in a subject’s body or an emotion captured on a subject’s face. Both of these elements have the power to be the defining reason that a photograph is great.” Though these words appeared in a Digital Photography School article about street photography, I think it’s fair to say that they apply to all kinds of photography, including bird photography.
Sometimes the gesture can be simple, as it is here, in Don Dedmon’s Pine Warbler photo (note the left foot),

or here (note the open beak—and all those tiny marching feet).

But sometimes the gesture can be grand and a bit more dynamic, as it is here,
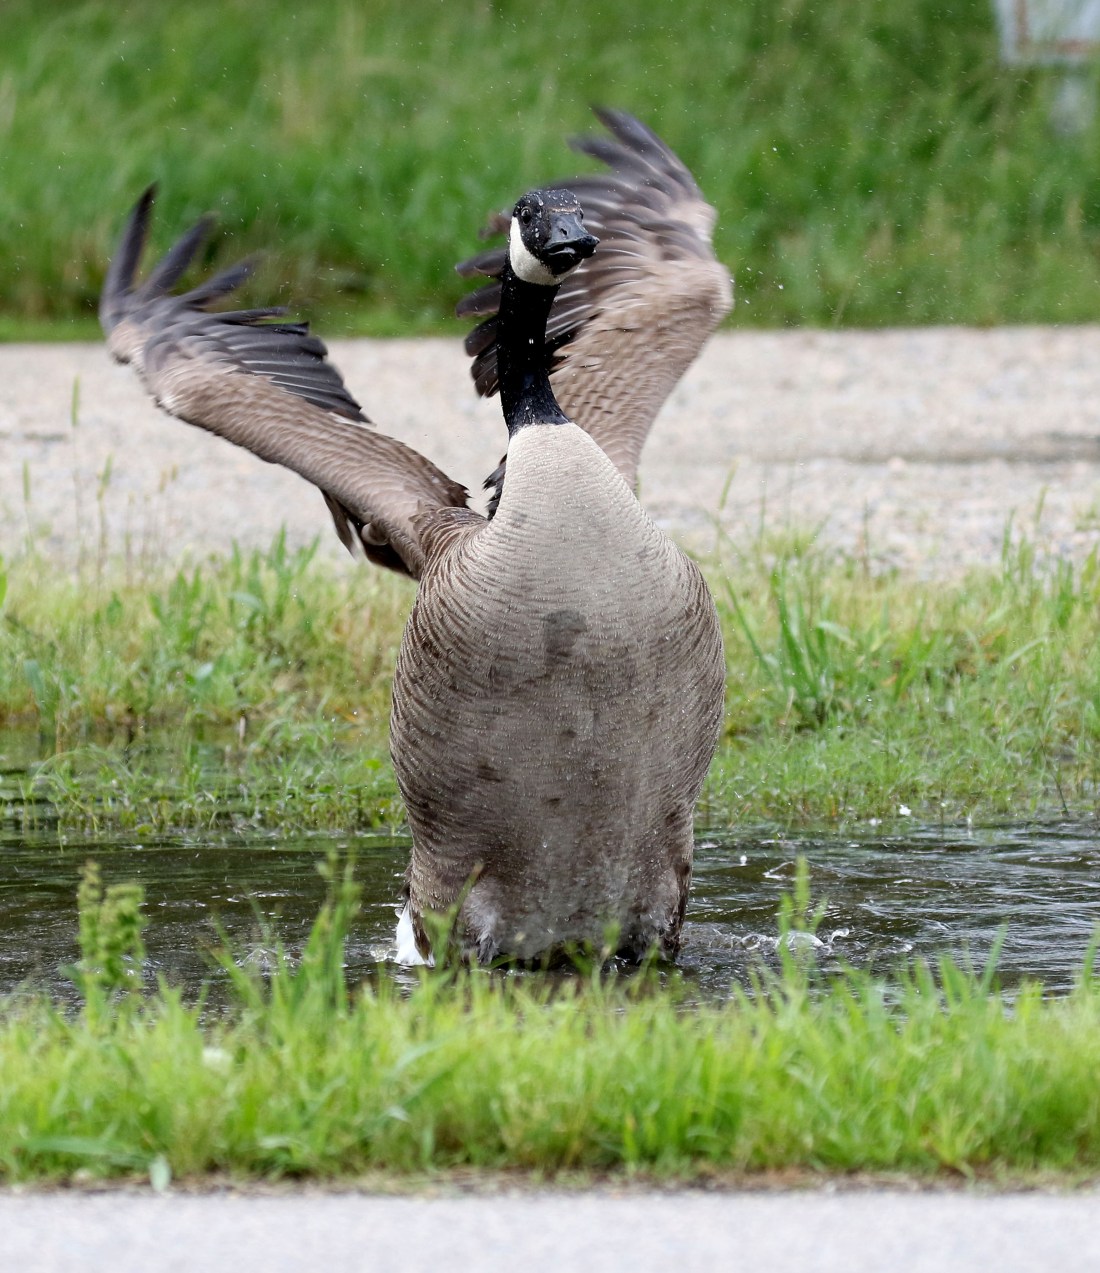
and here.
I took the above 3 photos, by the way, just like I took the Osprey flight shot before them, using both AI Servo and burst modes. There was just no other way to do it.
Capturing Movement
I mentioned the sense of dynamism or feeling of movement in Erik Brito’s wonderful Osprey photo in “Bird Photos and Photo Tips at Midyear.” And there’s movement or implied movement in the photos above. Capturing gesture is important, but capturing movement in your photos is important, as well.
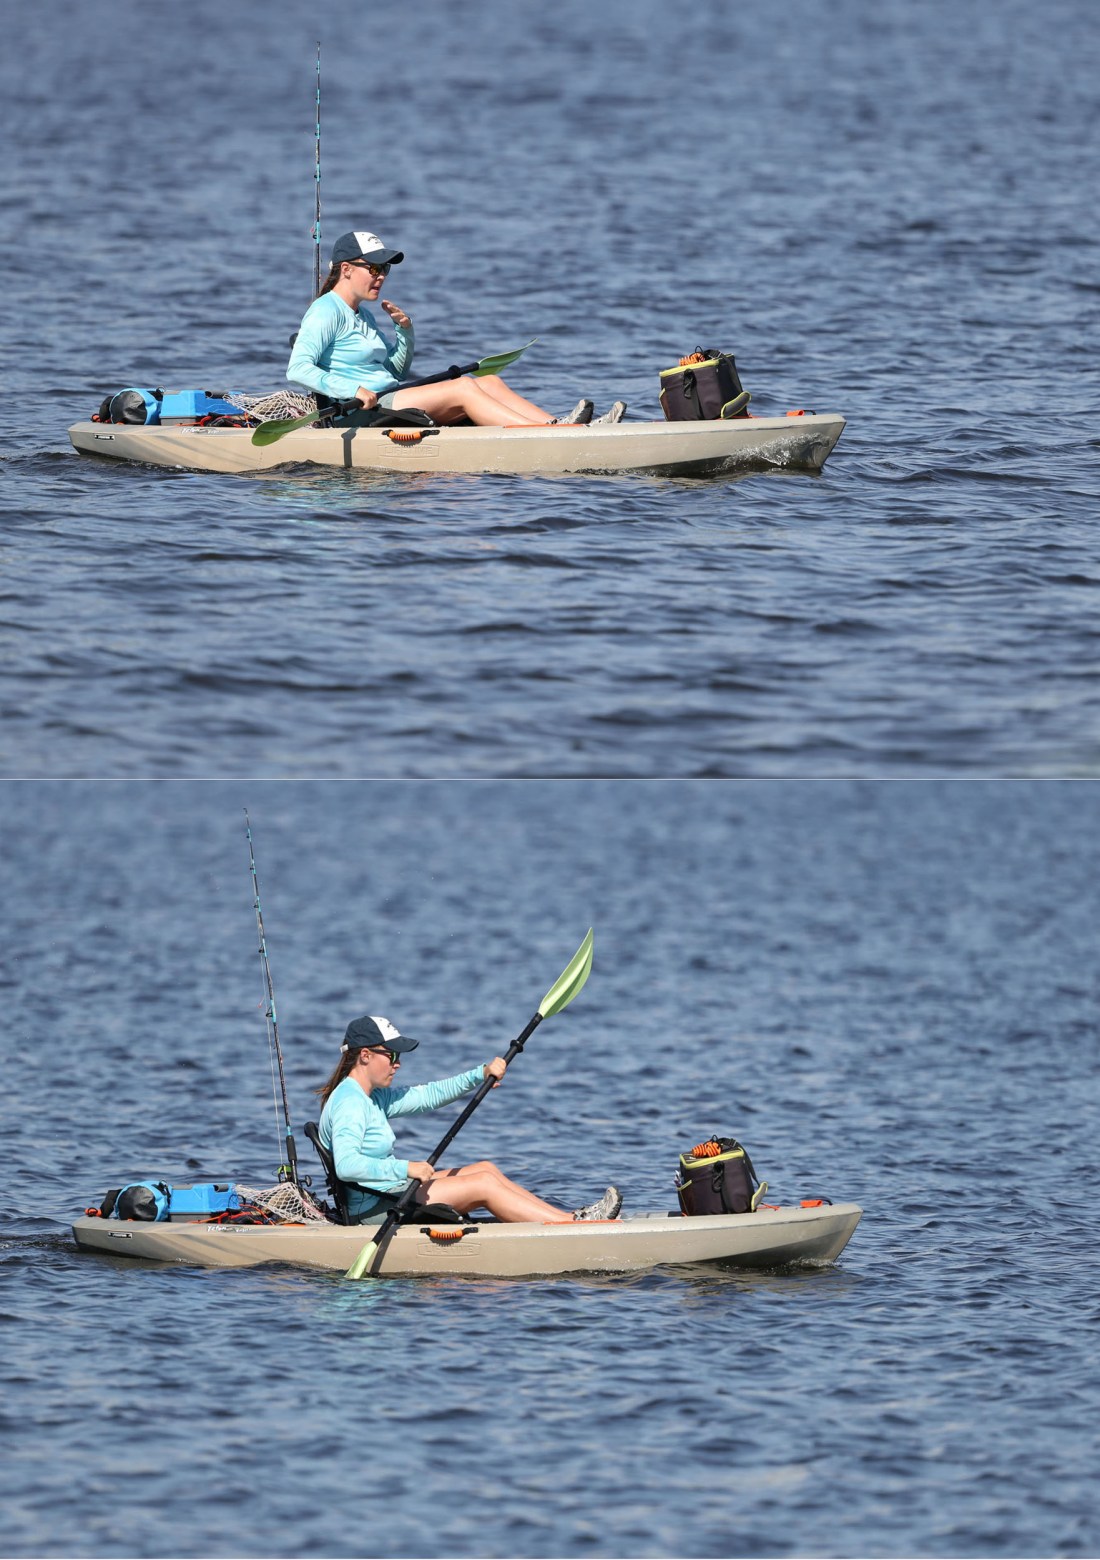
This makes me think of 2 shots I took of a young lady kayaking on the Elizabeth River in Chesapeake. You’ll recall that I wrote the following in the last blog: “If nothing much is happening, capture starlings and dragonflies, or musicians and fishermen, instead.” Well, we could add kayakers to that list.
There’s no sense of movement in the top photo, but there is in the more interesting bottom one.
This cottontail photo captures movement, as well. I enjoyed taking pictures of the rabbit as it sat in the grass and fed. But I was thrilled to grab it in mid-air as it took off and headed toward me.

Elements of Composition
I posted the photo on the “Virginia Wildlife” Facebook page and received comments like this: “Wonderful action, wow!” Everyone responds to action photos. But one person commented this way: “Simply a perfect shot.” Here’s what I think she meant.
The Background and Negative Space
She was responding to the element of action, of course. But she was also responding to the elements of composition: the uncluttered and defocused background that makes the cottontail stand out, and the negative space or “breathing room.” Though there’s not a lot of breathing room in the photo, and there could be more, it’s easy to see that this young rabbit is running toward some place.
Here’s an immature gull photo that helps to illustrate the role of the background and the importance of negative space. This may not be the ideal background, but to me, it works pretty well. I’ve always loved the complementary lines, shapes, and colors behind this bird. And the negative space below and to the right is an important element and works well, too. After all, this bird is about to land some place.

Just imagine if the framing were tighter and if the bird were more centered. The photo wouldn’t be the same and wouldn’t have the same feel. Here’s what I mean.

I wrote about some of the above in my earlier blog about birds and bird flight, “Flying Machines.” There, I posted this crow photo, and here’s what I wrote about the image: “I don’t usually crop flight photos the way I cropped this crow photo. Flight shots, especially, need “breathing room.” It’s always best to capture a bird flying into a space. Here it appears as if the crow were just suspended in space, like part of a mobile. Action photos need a dynamic feel. This photo, though good, lacks that.”

Tighter Framing
One of the reasons I bring up breathing room—I see far too many photos that lack it. The 2 photos above are perfect examples. But having said that, tightly framed shots can work and work well, especially if the subject isn’t on the move. Here’s an example of what I mean.

A few things to note, though. There’s implied movement (the chick was eating), which gives the photo interest, and the background is defocused and uncluttered, which serves to highlight the little guy or gal and make it the focal point. I also just managed to capture its eye (always, so important).
Here’s another even more tightly framed shot. I was experimenting and having fun here (and it’s important to experiment and have fun when you shoot—and to sometimes toss the rules aside, too.) But I also did things this way to provide detail, which is the reason I’d so tightly framed the crow shot—to show the aerodynamic shape of a bird’s body, the structure of a bird’s wing.

And This Just In
- I’ve mentioned the Digital Photography School a number of times, as I have here, and I’ve provided links to their articles. The DPS is an excellent resource for budding photographers as well as more seasoned ones. At the very least, you might want to get on their mailing list. You’ll receive tips on everything from buying camera gear to post-processing.
- I didn’t make reference to it in this blog, but fredmiranda.com is a great resource for photographers at all levels, as well. You can buy and sell used gear there, you can post photos there, and you can learn from others—or offer others help—in the many forums.
- Alas, I need to correct something else. I wrote in my earlier blog, “Meanwhile the Wild Geese,” about recording birds and about the equipment that I use. Please visit that blog to learn more. I use the Tascam DR-05 recorder extensively and I recommended it there. It turns out that that recorder has been discontinued and has been replaced by the Tascam DR-05X. The Tascam DR-05X can be paired with the Polsen SCL-1075 shotgun mic, which can be purchased separately. And I’ve contacted Bruce Rutkoski, the owner of Wildtronics, LLC. He informed me that the Tascam DR-05X can be paired with the Amplified Omni mic and the Wildtronics Parabolic Reflector, as well. I mentioned the Cornell Lab of Ornithology and Wildtronics, LLC association in my last blog. Once again…to me, the Cornell Lab stamp of approval on Wildtronics products speaks volumes.
Quip, Question, Quote
Here’s another avian quote, this time the midnight song of the Northern Mockingbird. I used my Tascam DR-05 and my Wildtronics gear to get it.
Thanks, as always, for reading—and listening. I look forward to your thoughts and your comments.


great information. And yes, the bunny shot is amazing!
LikeLike
Thanks so much, and I’m glad the info was helpful. I love the bunny shot, too, and was very lucky to get it.
LikeLike
I love all of your captures. These look amazing. Really so beautiful. And thanks for your tips
LikeLike
Robert, Thanks so much. Hopefully, the tips will help. FYI, I provided additional photos and photo tips here: https://birdpartner.com/2019/06/28/bird-photos-and-photo-tips-at-midyear/. All the best, Dave
LikeLiked by 1 person
You are welcome Dave. I will check this out
LikeLike
Thanks!
LikeLiked by 1 person